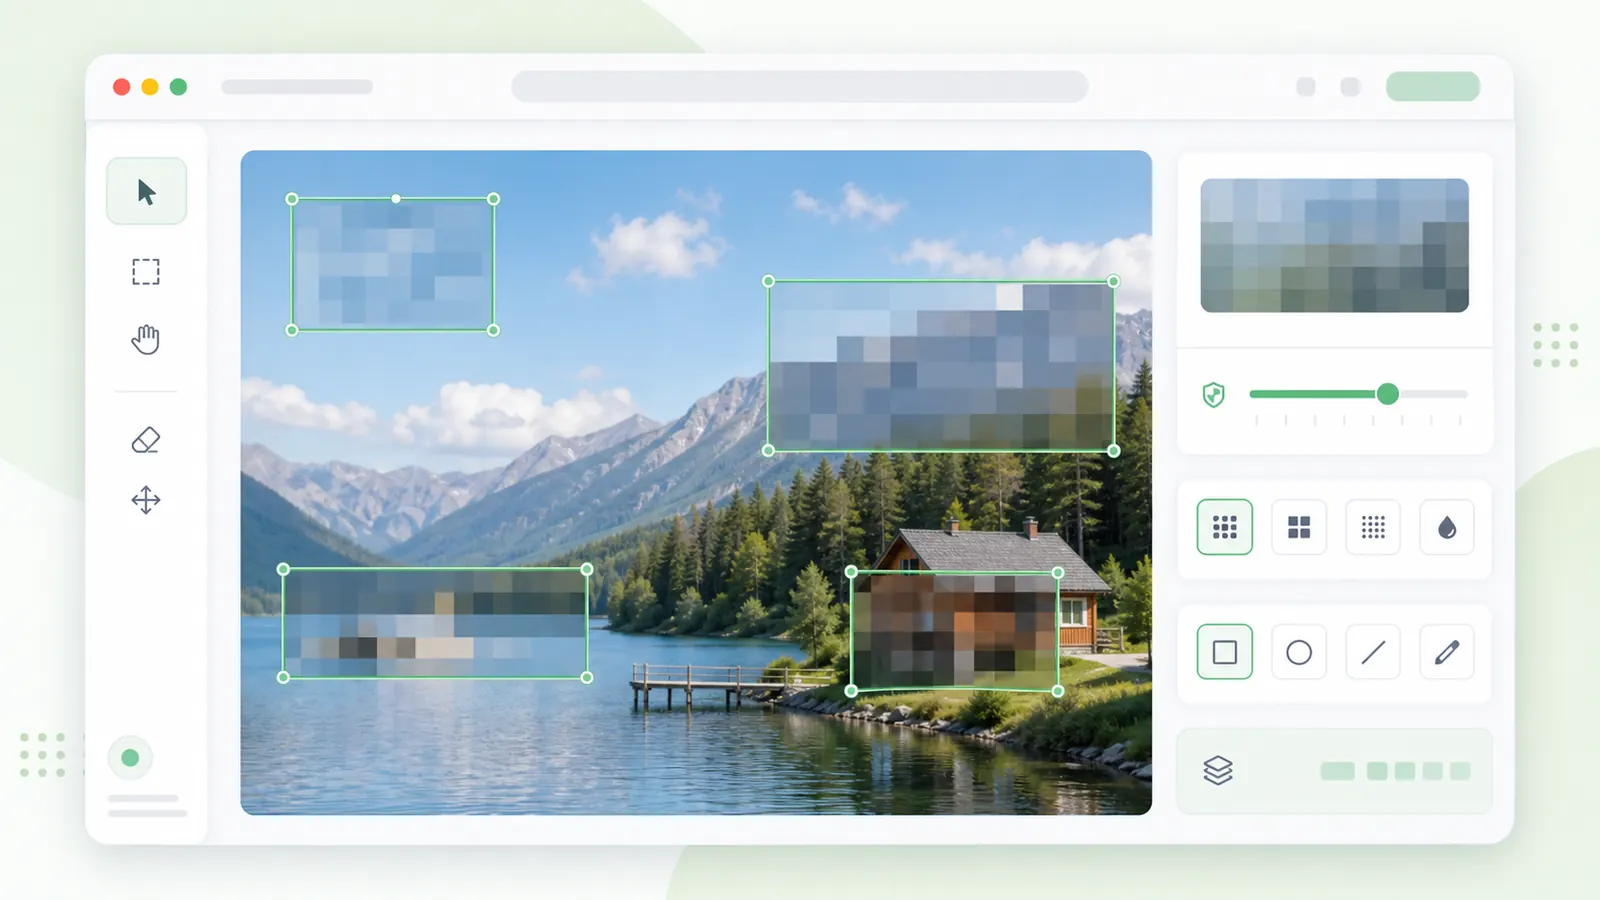
Pixelate part of image or whole image
Use the full-image pixelator when the entire photo should become blocky.
Whole imageSelected-area image masking
Use this pixelate part of image tool when one face, sign, license plate, username, or detail needs a visual mask while the rest of the image stays clear.
Draw one or more boxes, adjust strength, and export a PNG in your browser.
Upload an image, drag over the area to mask, choose pixelation strength, and download the edited PNG.
Upload or paste an image, then drag a box over the part that needs pixelation.
Tip: you can paste an image from your clipboard, then drag boxes over areas to pixelate.
Tip: you can paste an image from your clipboard, then drag boxes over areas to pixelate.
Selected-area pixelation works well for visual masking, while other privacy jobs need different outputs.
Use the full-image pixelator when the entire photo should become blocky.
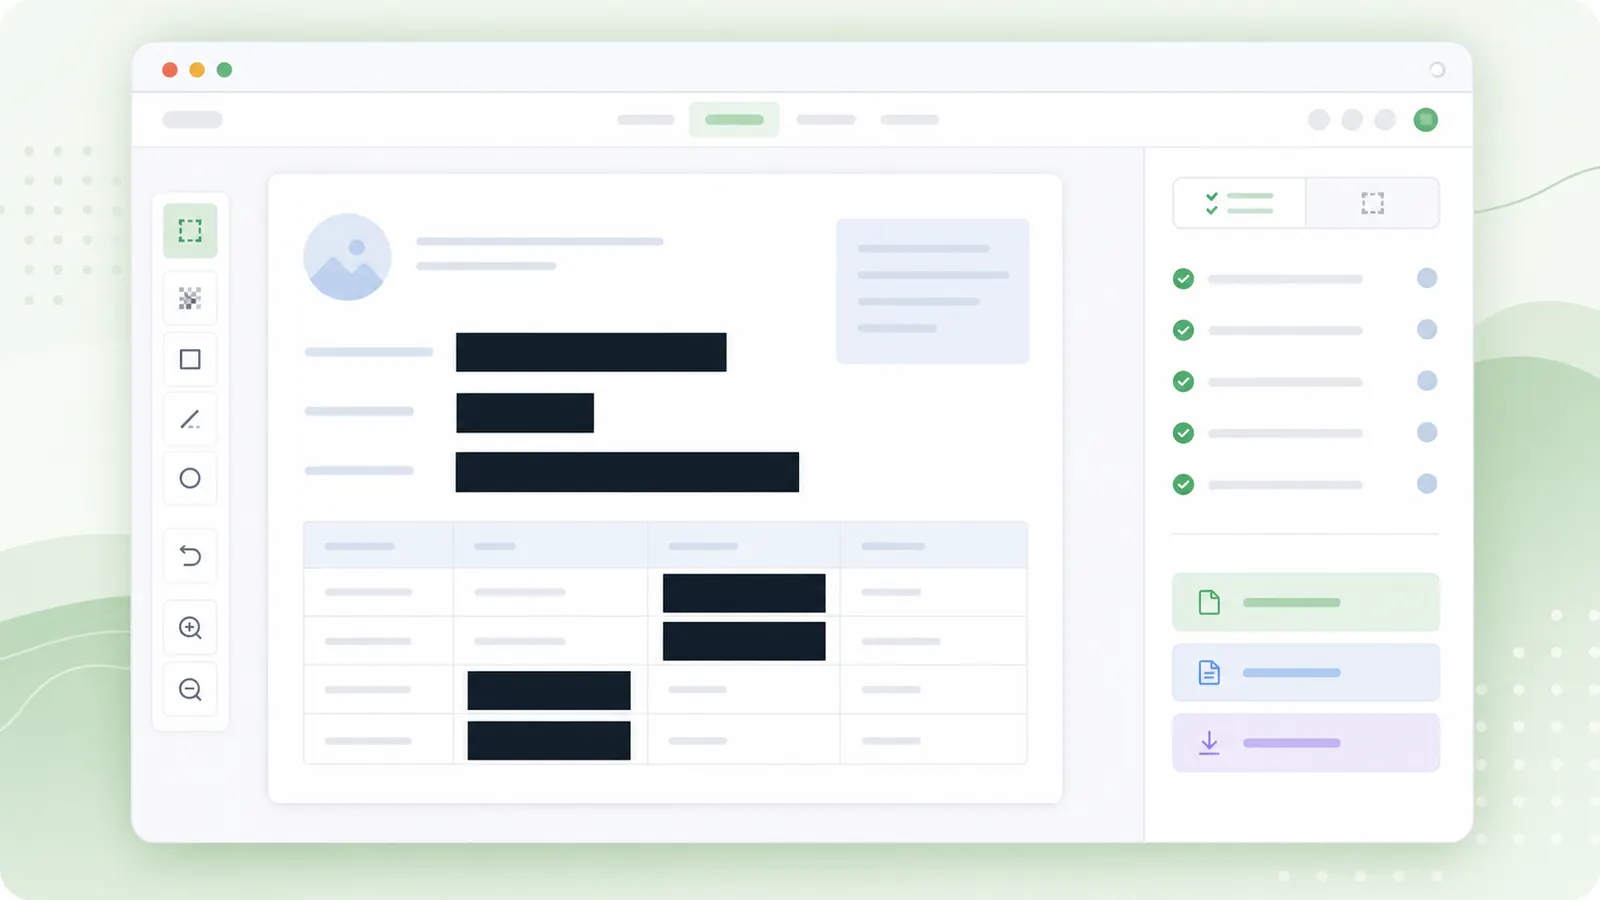
Whole imageUse redaction when the selected area contains passwords, IDs, or account details.
Sensitive dataUse the screenshot blur page when you are cleaning a copied screenshot before posting.
ScreenshotsSelected-area pixelation is useful when you need privacy without losing the whole scene.
Draw boxes over faces, signs, usernames, plates, or project details while preserving the surrounding context.
If the selected area contains secrets or regulated data, cover it with a solid redaction box instead of a reversible-looking visual effect.
A small region editor is easiest when you work from broad boxes to detail checks.
Upload or paste the image, then drag a box around the area that needs masking.
Increase strength for larger blocks, or switch to blur or redaction if the region needs a different style.
Check every selected region before downloading because missed details can remain visible outside the boxes.
Questions people ask before masking a selected area.
Yes. Draw multiple boxes over separate areas and the region count will update.
No. Use solid redaction for passwords, API keys, ID numbers, bank details, legal data, or medical data.
Yes. You can paste an image from your clipboard on supported browsers, then select the region to mask.
Draw a region, adjust the strength, and download the masked PNG.
Switch to redaction when the selected area contains highly sensitive text.
Pixelation is visual masking, not guaranteed secure redaction.